In this article we will cover how to customize your documents with your logo, terms, and contract.
Section 1: Adding Your Logo
Section 2: Document Intro, Terms, and Contract
Section 3: Text Formatting
Section 4: Advanced Formatting
Note: Each document type (Estimate, Work Order, Change Order, Invoice, Receipt) each have their own seperate Intro, Terms, and Contract so be sure to select each document type on the right hand side of the screen to make sure each have the correct information. Always be sure to save your changes before switching document types or leaving the page.
Adding Your Logo
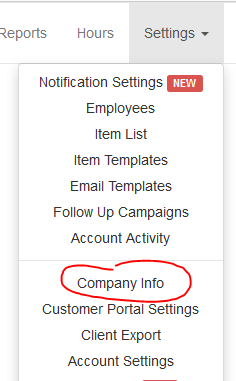
1.) Go to Settings>Company Info.
2.) Select Browse and find your image.
3.) Once finished, select Update at the bottom to upload your image.

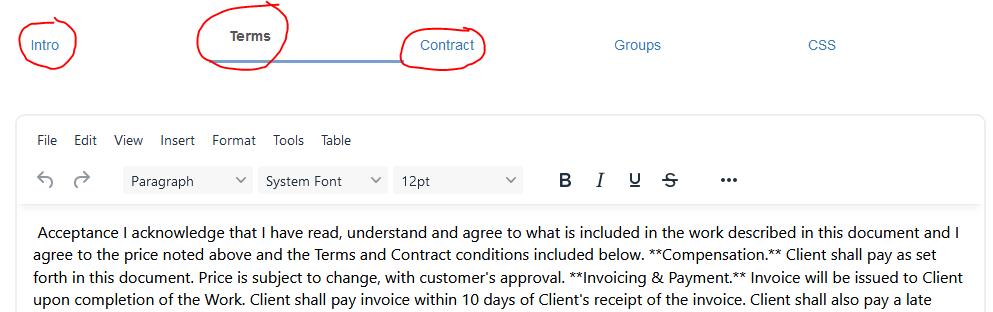
Document Intro, Terms, and Contract
Text can be displayed before the line items by using the Intro field on the Document Template page. Terms will display after your line items at the bottom of the document and Contract will display below the terms.
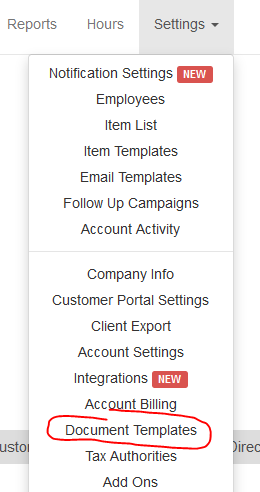
1.) Go to Settings>Document Templates.
2.) Select a tab on the bottom half of the page and enter your text.
Text Formatting
Text can be formatted using the WYSIWYG editor.

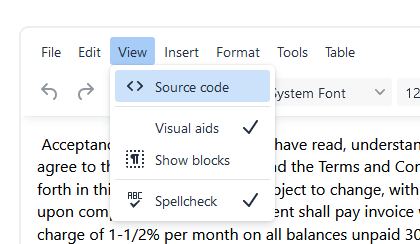
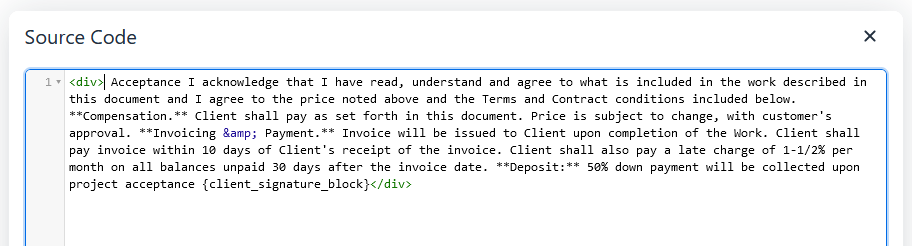
If you have an HTML expert available you can also view and edit the actual source code