First you will need to setup Zapier. If you don't have a Zapier account, you will need to make one first with the "For Work" subscription. Zapier is a bridge between Estimate Rocket and YouCanBookMe and can also be used to connect your account to other third party services as well. The setup process is broken into three parts:
Connecting Estimate Rocket To Zapier
1.) Go to https://estimaterocketapi.com/ and login with your Estimate Rocket account owner login - this will give you access to the Estimate Rocket API.
2.) Login to your Zapier account or create a new account if you don't already have one here: https://zapier.com/pricing
Note: If you plan on using a premium app such as QuickBooks Online, you will need the "Starter" tier. If the app you want to connect with is not a premium app then you can use the "Free" tier.
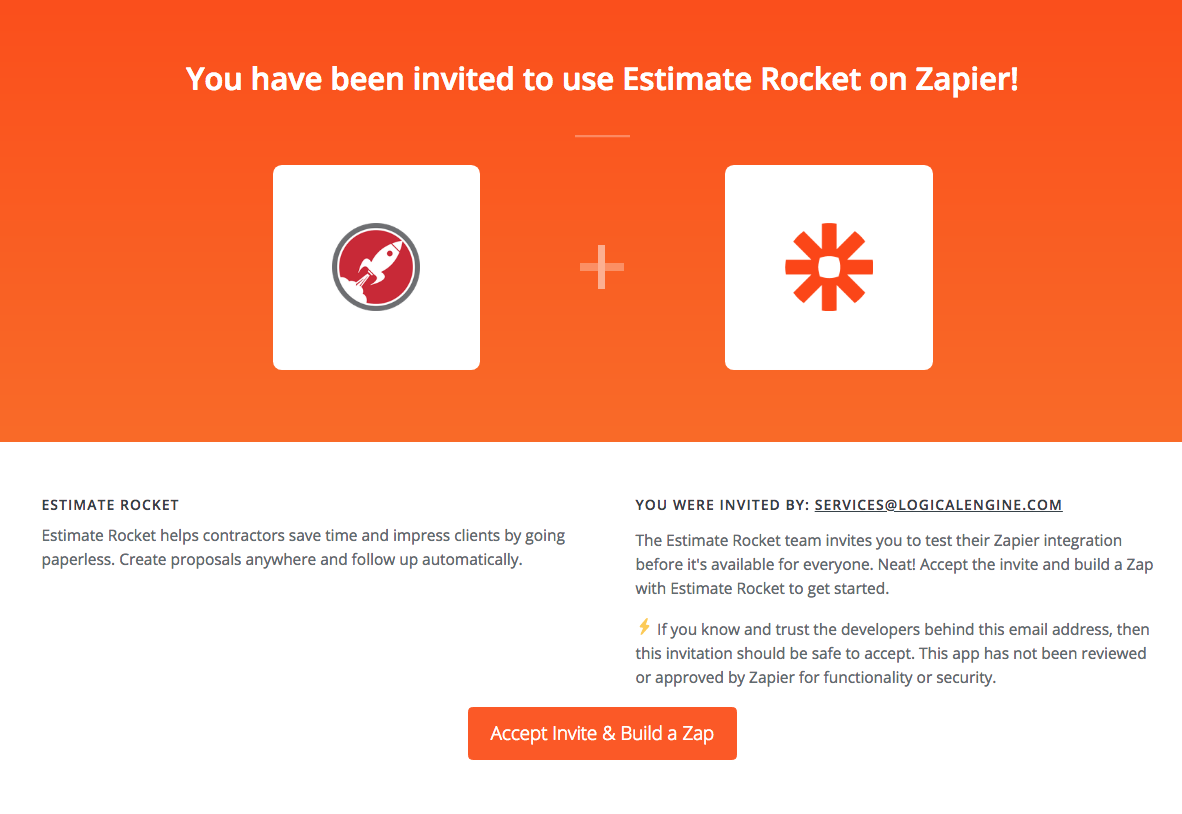
3.) Click this link for the invite page that will add Estimate Rocket to your app list in Zapier: https://zapier.com/developer/public-invite/150116/97091d454546e3ac6b960f638f82be35/
When the confirmation dialog appears, click Accept Invite & Build a Zap, this will connect Estimate Rocket to your Zapier Account. Once finished you can begin creating zaps and start sending information to other applications.
Setting up YouCanBookMe
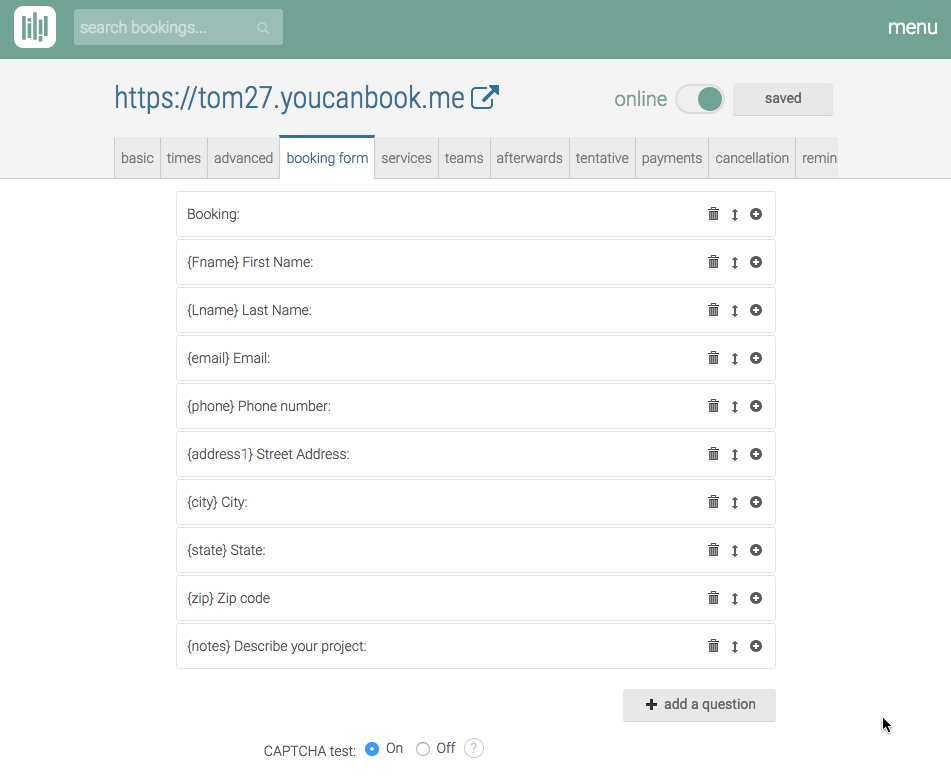
1.) First, create your form in YouCanBookMe and make sure you have at least the following fields:
Before the next step, go to your YouCanBookMe page and book an appointment and fill in all the information. This will give Zapier test information to work with.
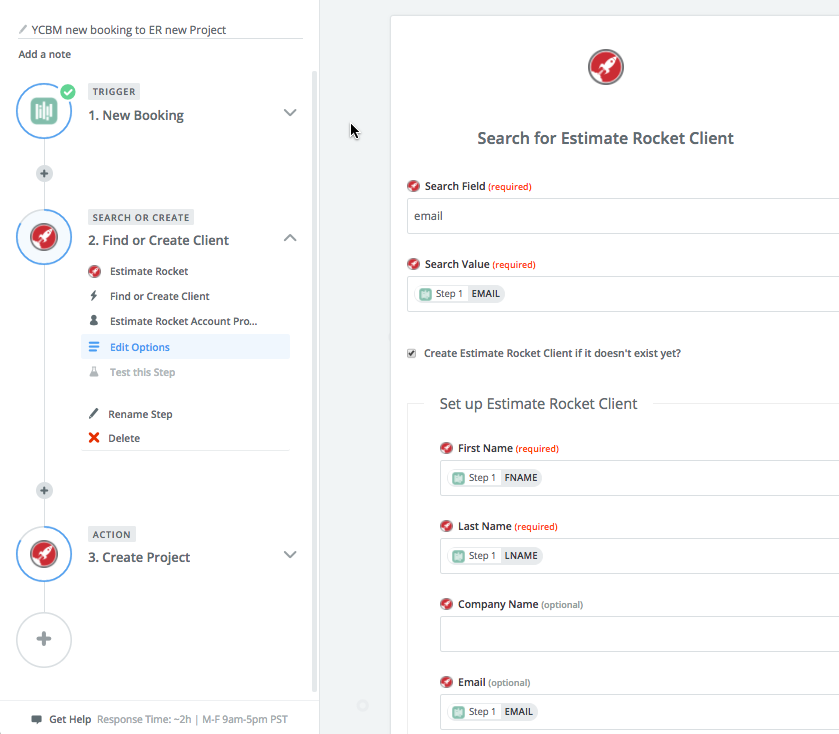
2.) Next, in Zapier, you will need to select Make a Zap. Select You Can Book Me and and then New Booking as the Trigger. Select your YouCanBookMe calendar and then click Test then Continue.
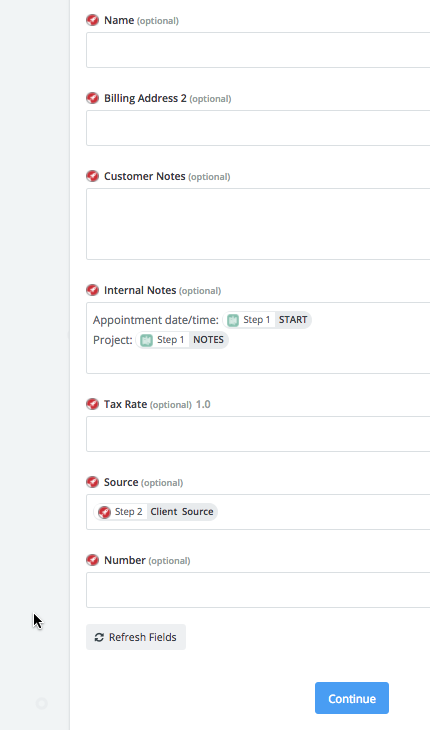
3.) Select Estimate Rocket, Find or Create Client as the Action then select your Estimate Rocket account and click Test, then Continue. Now fill out the field options as follows and click continue when done:
Continued....
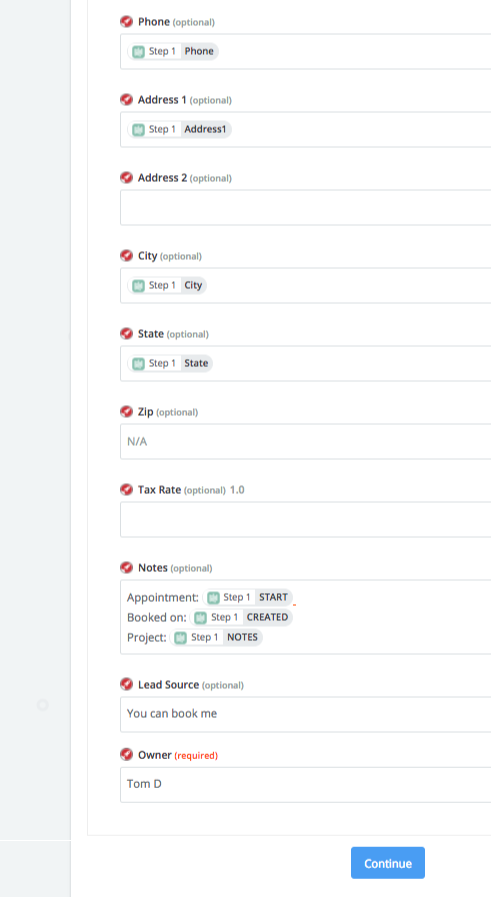
4.) Once you click Continue, and test the step, you need to Add Another Step. Select Estimate Rocket again and this time choose Create Project as the Action. Select your Estimate Rocket account again. Then continue and fill out the fields as shown below. Make sure and use the Owner drop down to select the Estimate Rocket user you want incoming leads to go to.

Continued....
That should do it. Once you turn on your Zap, each time a client books an appointment on YouCanBookMe, you should get a client and project created in Estimate Rocket. The new projects will show up on your dashboard under Estimate Pending Schedule. Edit the project and you can Schedule the Estimate Rocket appointment based on the information in the Internal Notes.
If you want to be notified when these projects are created, you can use the Estimate Rocket Followup Campaign for the Estimate Pending Schedule step. Set the campaign to Automatic, the days to 0 and select an email template that will not email the client, just the Project Owner.