This guide will go through setting up the link between Estimate Rocket and HomeAdvisor. Zapier does not directly integrate with HomeAdvisor so don't worry if you do not see them listed on Zapiers website, Home Advisor still has an API which we will access using the Webhooks feature. When setup, the way it will work is when HomeAdvisor creates a new lead it will trigger the Zap and create a new client and project in Estimate Rocket.
1.) Connect Estimate Rocket to Zapier. (Setup instructions can be found here.)
2.) In Zapier create a new Zap.
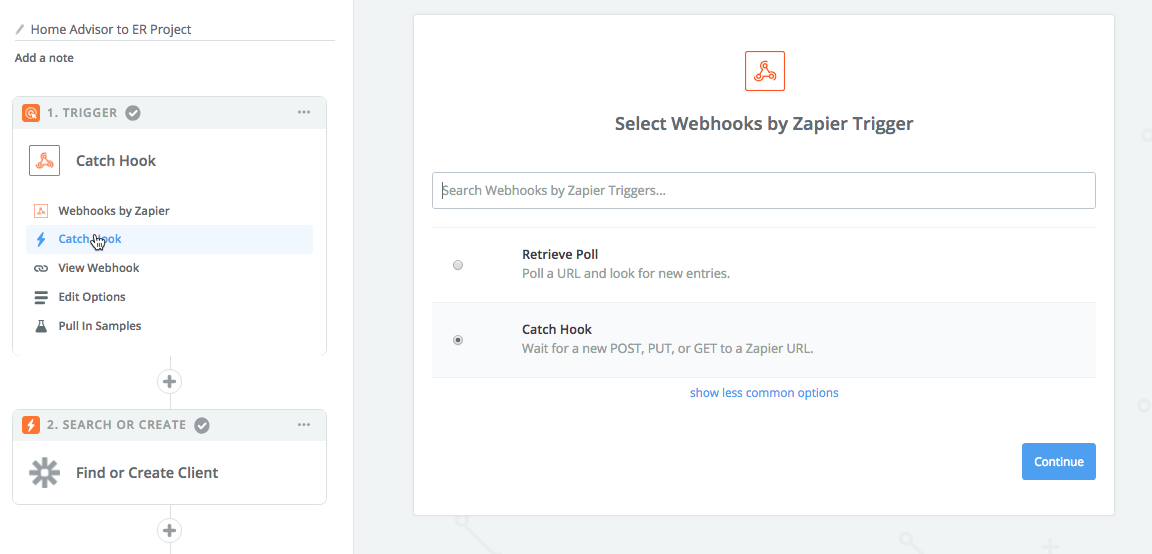
3.) Search for Webhooks and select it.

4.) Select Catch Hook.

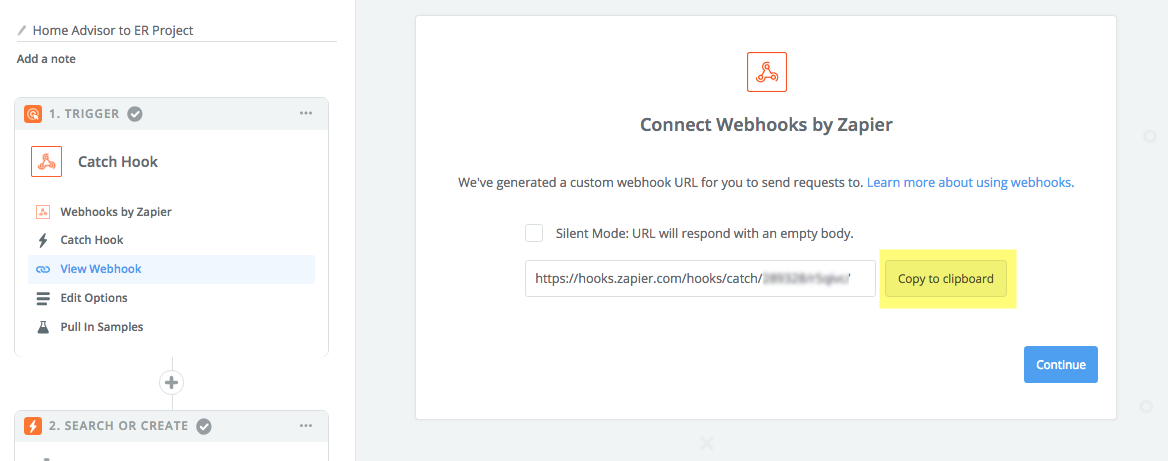
5.) Copy the custom Webhook URL that Zapier generates.

6.) Email the custom Webhook URL to crmintegrations@homeadvisor.com with the following email:
Hi Integration Team.
My company name is {your company name} and my phone number is {your phone number}.
Please use the following URL as the Testing Endpoint URL and Production Endpoint URL for your HTTP post feed of new leads for my Home Advisor account.
Then Paste the Zapier URL you copied into the email.
NOTE: They may call to confirm your account information
7.) Add an Action step.
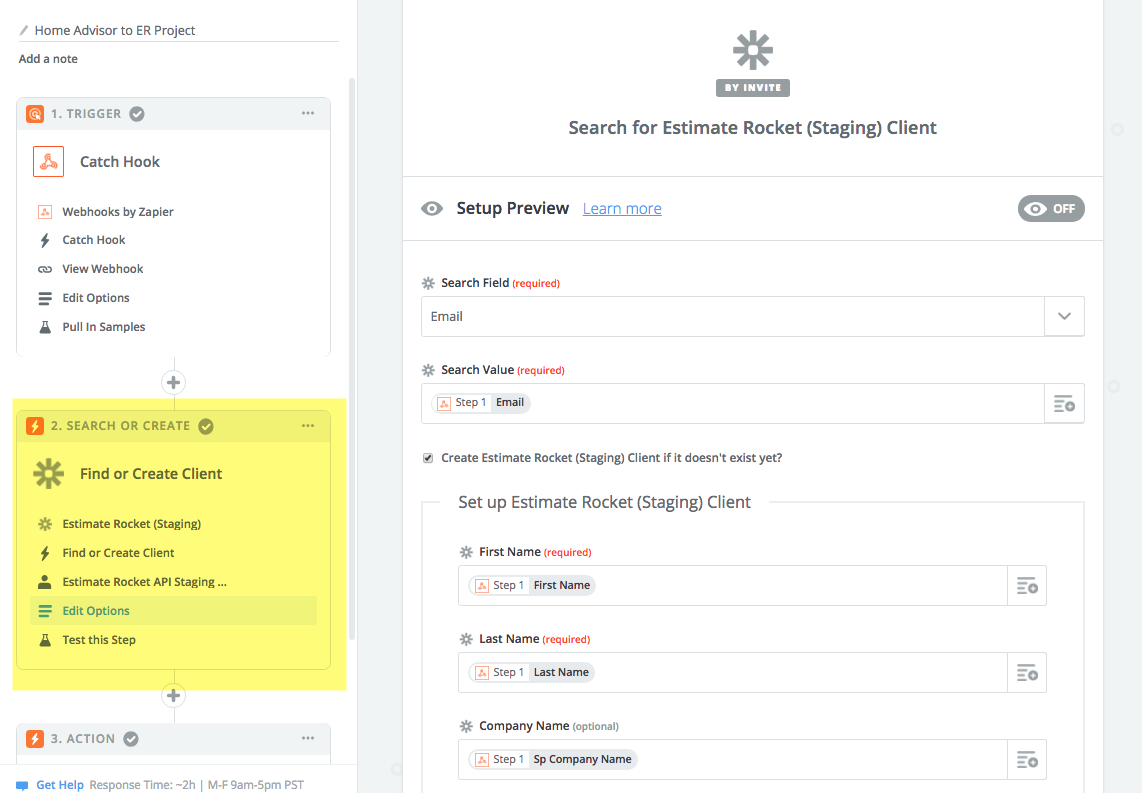
8.) Search for Estimate Rocket and choose Find or Create Client.
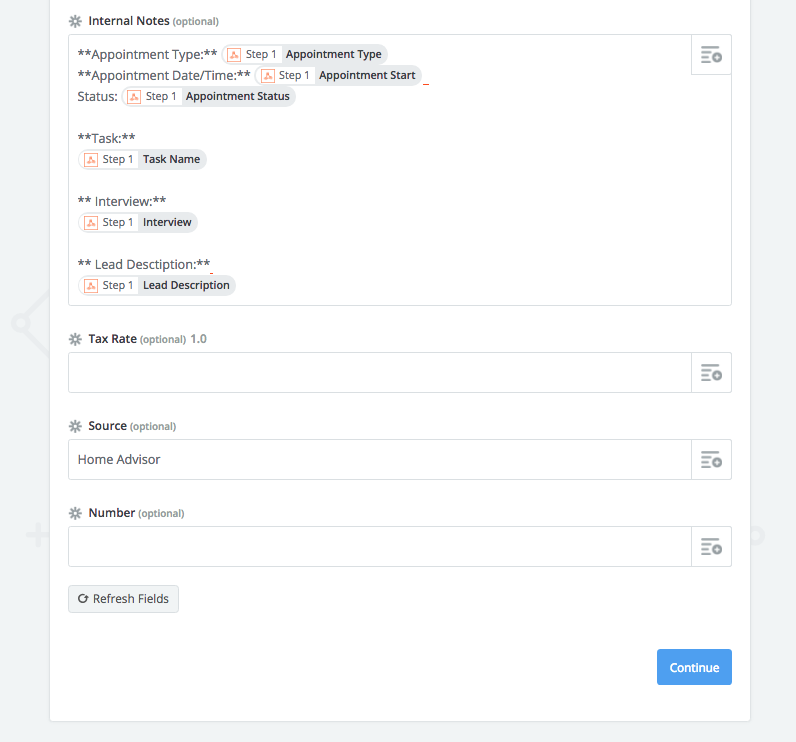
9.) Map fields from Home Advisor as shown:


10.) Add another Action step.
11.) Search for Estimate Rocket and choose Create Project.
12.) Map fields from Home Advisor as shown:


The Home Advisor setup is now complete. Be sure to enter a test client into Home Advisor and check that it goes into Estimate Rocket. If it does not work, review each step of your Zap again to make sure it is setup correctly. If you need additional help, please contact our support team and we will be happy to help you.